Creating a stunning backyard fire pit doesn’t require professional contractors or a massive budget. With the right guidance and materials, you can build a beautiful fire pit area that becomes the heart of your outdoor living space. This complete guide walks you through everything from design inspiration to step-by-step installation.
Whether you’re working with a small yard or planning an extensive garden project, building a fire pit transforms how you enjoy your home. The process takes just a weekend for most designs. You’ll create memories around dancing flames for years to come.
Build Your Dream Fire Pit with Confidence
Get instant access to professional fire pit building plans, safety guidelines, and design templates. Join thousands of successful DIYers who transformed their backyards this year.
Before you start building, proper planning ensures your fire pit area becomes a functional and beautiful space. The location impacts everything from safety to enjoyment. You need to consider several factors before breaking ground.
Choosing the Perfect Location
Your fire pit needs space away from structures and overhanging trees. Most local codes require at least 10 feet from your house. Check weather patterns in your yard to avoid smoky seating areas.
Level ground makes installation easier and safer. A slight slope requires extra preparation work. The area should be large enough for your fire pit plus comfortable seating.
Determining the Right Size
Fire pit diameter typically ranges from 36 to 44 inches. Smaller pits suit intimate gatherings while larger sizes accommodate bigger groups. The size impacts how much area you need to clear and level.
The style you choose affects both appearance and construction difficulty. Each design offers unique benefits for your backyard. Let’s explore the most popular options that DIYers love.
In-Ground Fire Pits
In-ground designs create a sleek, permanent look. You dig a pit into the earth and line it with fire-resistant materials. This style works beautifully in flat yards and offers excellent wind protection.
The project requires digging and drainage planning. You’ll need to ensure proper air flow for the fire. Most in-ground pits need a gravel base for drainage.
Above-Ground Stone Fire Pits
Stone fire pits are the most popular DIY choice. They use concrete blocks or natural stone in stacked rows. The construction process is straightforward for beginners.
You can build a basic stone pit in one weekend. The materials are affordable and available at any home improvement store. Construction adhesive holds the blocks together permanently.
Natural Stone Style
Uses irregular fieldstones for a rustic, organic appearance. Each stone fits together like a puzzle. This style blends beautifully with natural garden settings.
Concrete Block Style
Features uniform blocks in neat rows creating clean lines. Quick to build and budget-friendly. Perfect for modern or traditional backyards.
Brick Pattern Style
Combines traditional brick in decorative patterns. Offers timeless appeal and excellent heat retention. Slightly more complex but stunning results.
Fire Pit Kit Installations
Fire pit kits provide all components in one package. You get a metal ring and instructions for quick assembly. Many kits include decorative stone veneers.
Kit installations take less time than building from scratch. The metal ring ensures proper size and fire containment. You still need to prepare the base and install blocks around the ring.
Gathering the right materials before you start saves time and frustration. Most supplies are available at hardware stores. Here’s everything you need for a standard stone fire pit.
Primary Building Materials
Your main materials include concrete blocks or fire pit pavers for the structure. A fire pit kit with metal ring makes construction easier. You’ll need gravel for the base layer.
Concrete retaining wall blocks (approximately 30-40 blocks depending on size)
Fire pit metal ring insert (36-44 inch diameter)
Pea gravel or crushed stone (3-4 bags for base)
Construction adhesive designed for outdoor use
Leveling sand (2-3 bags)
Landscape fabric to prevent weed growth
Required Tools
You don’t need expensive or specialized equipment for this project. Basic tools get the job done. Most DIYers already own these items.
Level (4-foot length recommended for accuracy)
Garden rake for spreading gravel evenly
Shovel for excavating the area
Tape measure and spray paint for marking
String and stakes for creating perfect circles
Hand tamper or plate compactor for base
Work gloves and safety glasses
Step-by-Step Fire Pit Construction Guide
Building your fire pit follows a logical sequence. Each step builds on the previous one. Take your time to ensure each phase is done correctly.
Step 1: Mark Your Circle
Start by determining the exact location and size. Drive a stake in the center of your planned fire pit. Tie string to the stake and attach spray paint at your desired radius.
Walk around the stake keeping the string taut. Spray paint marks your perfect circle. Add an additional circle 12 inches outside the first for your seating area.
Step 2: Excavate and Level the Area
Remove grass and dig down 4-6 inches within your marked circle. The pit area needs to be level. Use your shovel to remove dirt and create an even surface.
Check the level frequently as you dig. Low spots need filling while high areas need more removal. A level base prevents structural problems later.
Step 3: Install the Gravel Base
Pour gravel into the excavated area to create drainage. Spread it evenly with your garden rake. The gravel layer should be 3-4 inches deep.
Compact the gravel using a hand tamper. Walk on it to identify any soft spots. Add more gravel to low areas until everything is firm and level.
Never Worry About DIY Mistakes Again
Get detailed video tutorials showing every step of fire pit construction. Avoid costly errors with professional guidance. Includes material calculators and safety checklists.
Place your first row of blocks directly on the gravel base. Arrange them in your desired circle following the spray paint guide. Check level constantly as you place each block.
The first row blocks should touch each other. Adjust placement until everything is level. This row determines the quality of your entire pit.
Step 5: Add Additional Rows
Apply construction adhesive to the top of your first row. Place the second row blocks offsetting the joints. This creates a stronger, more stable structure.
Most fire pits use three to four rows of blocks. Check the level after each row. The third row typically sits just above ground level for safety.
Step 6: Install the Fire Pit Ring
Place the metal fire ring inside your completed structure. The ring contains the fire and protects your blocks. It should rest on the gravel inside the pit.
The fire pit ring should fit snugly with small gaps around the edges. These gaps allow air flow while preventing blocks from direct flame contact. Your basic structure is now complete.
Creating the Perfect Fire Pit Surrounding Area
The space around your fire pit matters as much as the pit itself. A well-designed area enhances safety and comfort. Consider how you’ll use the space for gatherings.
Installing a Paver or Gravel Patio
A paver surface creates a clean, finished look around your fire pit. You can also use additional gravel for a more casual appearance. Both options prevent grass damage from foot traffic.
Extend the paved area at least 3 feet beyond the fire pit in all directions. This provides safe standing room and prevents sparks from reaching grass. Use the same leveling techniques as the pit base.
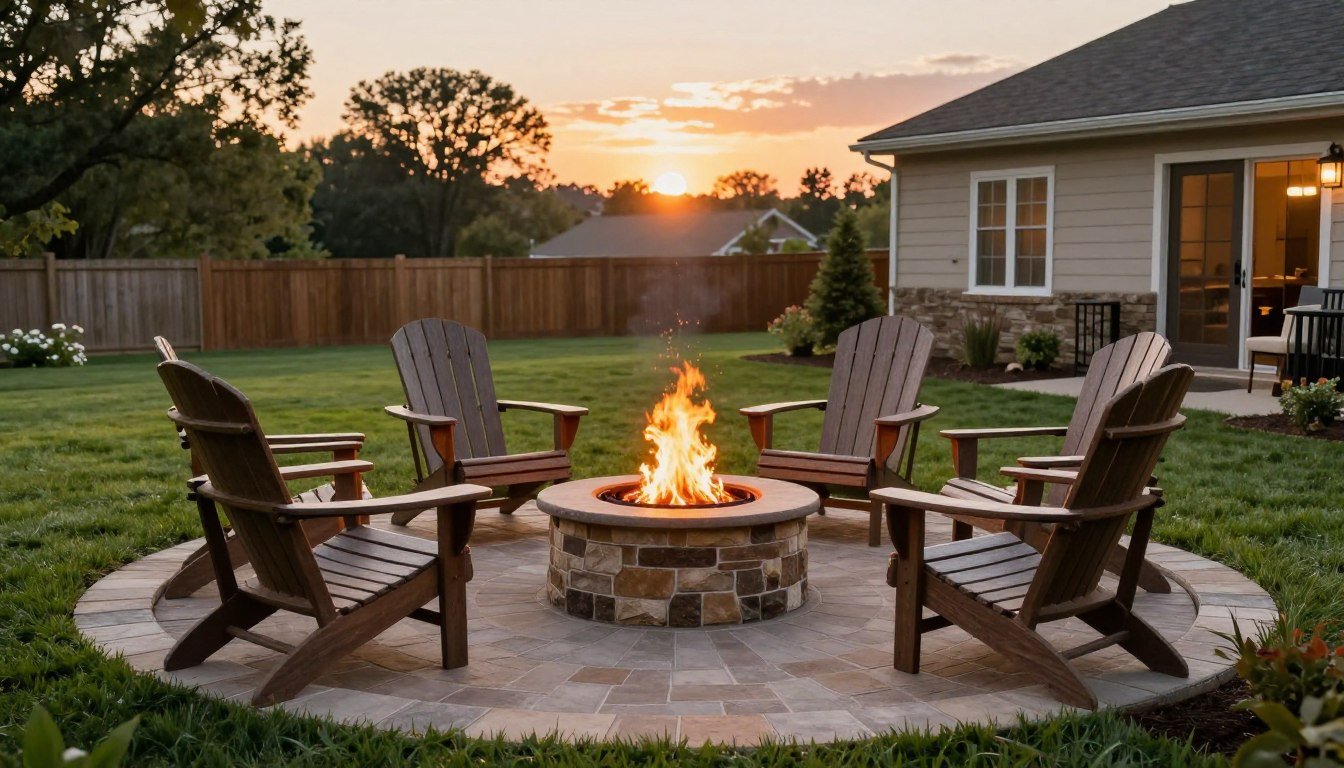
Arranging Seating
Place chairs in a circle around the fire pit. Adirondack chairs are popular for their comfort and style. Position seats 3-4 feet from the pit edge for safety and heat comfort.
Consider built-in seating walls for permanent solutions. These stone or block benches match your fire pit design. They save space and create an intimate gathering area.
Adding Landscape Elements
Plants and garden features soften the hardscape. Keep flammable materials at safe distances. Rocks, gravel paths, and fire-resistant plants work well.
Create defined pathways to and from the fire pit. String lights add ambiance for evening gatherings. Consider storage for firewood near but not too close to the pit.
Safety must be your top priority when building and using a fire pit. Proper planning prevents accidents and property damage. Follow these guidelines for safe enjoyment.
Local Codes and Permits
Check with your local building department before starting construction. Many areas require permits for fire pits. Regulations specify distance requirements from structures.
HOA rules may restrict fire pit construction. Your insurance company might have requirements too. Understanding regulations prevents expensive mistakes and legal issues.
Clearance and Location Safety
Maintain at least 10 feet from your house, deck, or other structures. Keep the area clear of overhanging branches. Low-hanging vegetation poses fire hazards.
Ten feet minimum from house, garage, or shed
Fifteen feet from trees with low branches
Away from property lines to avoid neighbor complaints
Consider prevailing wind direction
Avoid areas under power lines
Clear of underground utilities
Fire Safety Equipment
Keep a garden hose connected and ready near the fire pit area. A bucket of sand provides quick flame control. Store a fire extinguisher in an accessible location.
Never leave fires unattended even for short periods. Ensure fires are completely extinguished before going inside. Cold ashes are the only safe ashes.
Weather Considerations
Avoid using your fire pit during high wind conditions. Flying embers create serious fire hazards. Check weather forecasts before planning fire pit gatherings.
Dry conditions increase fire danger. Many areas implement burn bans during drought. Always comply with local fire restrictions and warnings.
Build with Complete Safety Confidence
Access comprehensive safety checklists, code compliance guides, and insurance-approved building methods. Protect your home and family with expert safety protocols.
Building a DIY fire pit costs significantly less than hiring contractors. Material costs vary based on size and style choices. Smart planning maximizes value without sacrificing quality.
Average Material Costs
A basic stone fire pit costs between 100 and 300 dollars for materials. Fire pit kits add 50 to 150 dollars depending on quality. Higher-end materials increase the total investment.
Material Component
Quantity Needed
Average Cost
Concrete blocks
30-40 blocks
$60-$120
Fire pit ring kit
1 ring
$50-$150
Gravel base
3-4 bags
$15-$25
Construction adhesive
2-3 tubes
$12-$18
Leveling sand
2-3 bags
$10-$15
Landscape fabric
10 feet
$8-$12
Money-Saving Strategies
Shop sales at home improvement stores for significant savings. Many stores discount landscaping materials in fall. Buying slightly irregular blocks cuts costs without affecting function.
Purchase blocks during seasonal sales
Use standard concrete blocks instead of specialty pavers
Skip the metal ring for lower-cost builds
Source gravel from landscape suppliers rather than bags
Borrow tools instead of buying
Start with a basic design and upgrade later
Comparing DIY to Professional Installation
Professional fire pit installation costs between 800 and 3000 dollars. You save 70 to 85 percent building it yourself. The project difficulty level suits most homeowners.
Your time investment is one to two weekends for most designs. The satisfaction of building your own pit adds intangible value. Friends and family will admire your handiwork for years.
Seeing completed projects sparks creativity for your own design. These popular styles work in various yard sizes and budgets. Each offers unique character to your outdoor space.
Classic Round Stone Designs
Round pits are the most popular and easiest to build. The circular shape promotes conversation and even heat distribution. This timeless design suits any yard style from modern to rustic.
Square and Rectangular Modern Styles
Angular designs create contemporary appeal. Square fire pits use the same construction methods with different block placement. The modern aesthetic works beautifully with current landscape trends.
Rustic Natural Stone Creations
Irregular stones create organic, cottage-style charm. This approach requires more artistic arrangement but offers unique character. No two natural stone pits look identical.
Fire Pit and Seating Wall Combinations
Integrated seating walls maximize space efficiency. The walls use matching materials creating cohesive design. This setup works perfectly for smaller yards.
Beach-Inspired River Rock Style
River rocks create a casual, coastal vibe around your fire pit. The varied colors and smooth texture add visual interest. This low-maintenance option works in any climate.
Sunken Conversation Pit
Lower the seating area around an in-ground pit for intimate gatherings. This dramatic design makes a strong statement. Perfect for flat yards with drainage.
Covered Pergola Design
Add a pergola over your seating area for defined space. String lights create magical ambiance. The overhead structure extends usability into shoulder seasons.
Fire Pit Maintenance and Long-Term Care
Proper maintenance extends your fire pit’s lifespan for decades. Regular care prevents deterioration and maintains appearance. These simple tasks keep everything looking great.
Seasonal Cleaning
Remove ash after each use once completely cool. Buildup restricts drainage and air flow. Sweep out debris and check for damage regularly.
Deep clean the pit each spring before the outdoor season. Scrub block surfaces with water and mild detergent. Check construction adhesive joints for any separation.
Weather Protection
Cover your fire pit during extended periods of non-use. Water accumulation damages metal components and promotes rust. Covers also prevent debris collection.
Ensure proper drainage if you live in wet climates. Add drainage holes or adjust gravel base as needed. Standing water accelerates deterioration.
Structural Inspections
Check block stability before each season. Look for loose blocks or adhesive failure. Repair problems immediately to prevent bigger issues.
Inspect adhesive joints annually
Look for cracked or damaged blocks
Check fire ring for rust or warping
Ensure level placement hasn’t shifted
Clear weeds from base perimeter
Touch up any damaged finishes
Troubleshooting Common Fire Pit Problems
Even well-built fire pits occasionally need adjustments. Recognizing issues early prevents major repairs. Here are solutions to frequent problems.
Smoke Problems
Excessive smoke usually indicates poor air flow. Check that your base gravel allows adequate ventilation. Wet wood also creates more smoke than seasoned firewood.
Wind direction affects smoke patterns. You can’t control weather but can adjust seating positions. Consider building a small wind screen on the prevailing wind side.
Water Drainage Issues
Standing water in the pit indicates drainage problems. You may need to add more gravel to the base. Drill small drainage holes if using a solid metal ring.
Unstable or Shifting Blocks
Movement suggests inadequate adhesive or ground settling. Remove affected blocks and reapply construction adhesive. Ensure the base remains level and stable.
Ground freeze and thaw cycles cause movement in cold climates. A deeper gravel base below the frost line prevents this problem. Consult local building codes for frost depth.
Solve Problems Before They Start
Get access to troubleshooting guides, repair tutorials, and maintenance schedules. Learn from common mistakes others made. Build it right the first time with expert knowledge.
A fire pit offers more than warmth and light. Small additions transform the space into your favorite outdoor retreat. These enhancements maximize enjoyment and functionality.
Lighting Design
String lights create magical ambiance for evening gatherings. Solar path lights illuminate walkways safely. Low-voltage landscape lighting highlights garden features around your pit area.
Consider installing permanent lighting on posts or pergolas. Battery-operated lanterns add flexibility for table surfaces. Good lighting extends usability and enhances safety.
Outdoor Cooking Accessories
Fire pits double as outdoor cooking spaces. Grilling grates fit over many pit designs. Roasting sticks and pie irons create fun cooking experiences.
Keep a dedicated storage box nearby for cooking tools and supplies. Include long-handled utensils and heat-resistant gloves. Stock marshmallow roasting supplies for spontaneous gatherings.
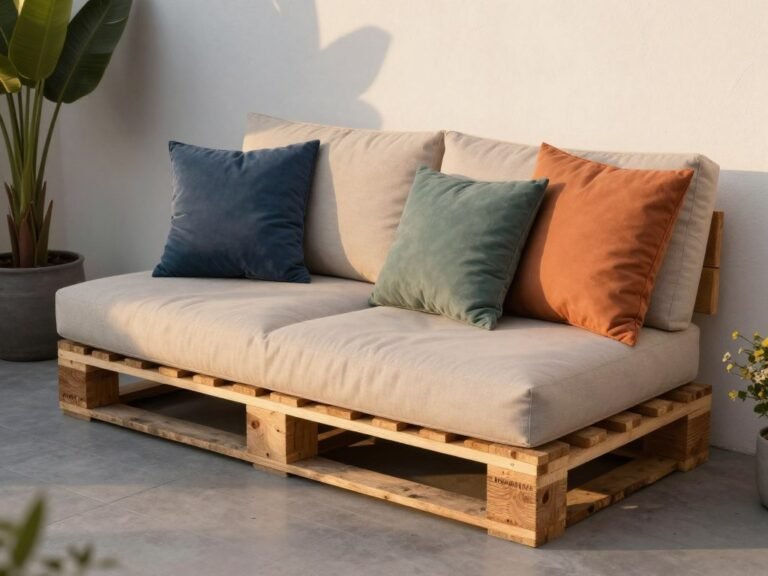
Comfort Additions
Outdoor cushions make seating more comfortable for extended gatherings. Weather-resistant blankets provide warmth on cool evenings. Side tables hold drinks and snacks conveniently.
Create storage solutions for fire pit accessories. A weather-resistant deck box holds cushions, blankets, and fire tools. Organization makes spontaneous gatherings easier to arrange.
Music and Entertainment
Outdoor speakers enhance the atmosphere with background music. Bluetooth options eliminate wiring hassles. Weather-resistant speakers withstand outdoor conditions.
Seasonal Fire Pit Enjoyment Tips
Your fire pit offers year-round appeal with proper planning. Each season brings unique opportunities for outdoor enjoyment. Adapt your approach to maximize comfort.
Spring and Summer Usage
Warmer months are perfect for evening gatherings as temperatures cool. The fire provides ambiance more than warmth. Keep fires smaller during hot weather.
Consider mosquito control for comfortable summer evenings. Citronella candles and fans help manage insects. Position seating to catch evening breezes.
Fall Fire Pit Season
Autumn offers ideal fire pit weather. Cooler temperatures make fires more comfortable. The fall color backdrop creates stunning settings.
Stock up on firewood before winter arrives. Seasoned hardwoods burn longer and produce less smoke. Store wood in a dry location near your fire pit area.
Clear snow from paths and seating areas before gatherings. Keep extra blankets available for guests. Hot beverages complement cold weather fires perfectly.
Start Your Fire Pit Project Today
Building a backyard fire pit transforms your outdoor living space into a gathering destination. The project offers manageable challenges for DIY enthusiasts of all skill levels. Your completed fire pit provides years of enjoyment and memories.
The combination of proper planning, quality materials, and careful construction ensures lasting results. You save significant money compared to professional installation. The satisfaction of building your own outdoor feature adds intangible value beyond dollars saved.
Start gathering materials and planning your design this weekend. Your backyard fire pit awaits creation. The project difficulty suits most homeowners willing to invest a weekend of work.
Transform Your Backyard This Weekend
Get instant access to complete fire pit building plans, video tutorials, safety guides, and design templates. Join thousands of successful DIYers who created their dream outdoor spaces. Start building today with confidence.
Your fire pit project begins with a single step. Measure your space, order materials, and dedicate a weekend to construction. The rewards of outdoor gatherings around your handmade fire pit make every hour invested worthwhile.
Creating a beautiful back patio doesn’t have to drain your bank account. With some creativity, smart shopping, and a bit of elbow grease, you can transform even the most neglected outdoor space into a cozy retreat that feels like an extension of your home. Whether you have a tiny apartment balcony or a spacious backyard…
Your role as a bridesmaid comes with excitement and responsibility. One of the most important decisions you’ll make is choosing the perfect hairstyle for the big day. The right wedding hairstyles for bridesmaids complement the bride’s vision while letting your personality shine through. Finding a look that works for your hair type can feel overwhelming….
The moment you decide to pop the question marks the beginning of an extraordinary journey. Wedding proposals represent one of life’s most significant milestones, transforming two individual paths into a shared adventure. Every year, countless couples experience this magical transition, each seeking to create a proposal that perfectly captures their unique love story. Planning the…
Your wedding head table serves as the visual anchor of your reception—a special space where you and your new spouse will share your first meal as a married couple. As all eyes naturally gravitate toward this focal point throughout the celebration, thoughtfully designed head table wedding decorations can transform this space into a breathtaking statement…
September weddings create a magical moment between summer warmth and autumn crispness. The season offers unique opportunities to explore rich colors and transitional styles. Finding the perfect september wedding guest dress means balancing elegance with practicality for unpredictable weather. This comprehensive guide walks you through everything needed to look stunning at fall weddings. You will…
When temperatures rise and the sun shines bright, nothing completes a summer wardrobe quite like the perfect dress. Summer dresses combine effortless style with comfort, making them essential for everything from casual beach days to elegant evening events. This guide explores the most stunning and versatile summer dress styles to inspire your warm-weather wardrobe, helping…