DIY Walk In Closet On A Budget: Transform Your Space Without Breaking The Bank
Have you ever dreamed of having a beautifully organized walk-in closet but been shocked by the price tag of professional systems? You’re not alone. Custom closet installations can cost thousands, but with some creativity and elbow grease, you can create a stunning DIY walk in closet on a budget that rivals expensive built-ins.
This Website contains affiliate links. That means I may earn a small commission if you purchase through my links, at no extra cost to you.
In this comprehensive guide, I’ll walk you through how to transform your closet space for a fraction of the cost of professional systems. Whether you’re working with a small reach-in or a dedicated walk-in space, these budget-friendly solutions will help you maximize storage while creating a closet that feels custom-designed for your needs.
Planning Your Budget-Friendly Walk-In Closet
The key to a successful DIY walk in closet on a budget starts with thoughtful planning. Taking time to assess your space, needs, and budget constraints will save you money and headaches down the road.
Start by emptying your closet completely and taking precise measurements. Measure the height, width, and depth of your space, noting any obstacles like doors, windows, or sloped ceilings. Draw a simple floor plan on graph paper or use a free online room planner to visualize your space.
Essential Measuring Tools
Accurate measurements are crucial for your DIY closet project. Get the right tools before you start.
Take inventory of your wardrobe and storage requirements. Count how many items need hanging space versus folded storage. Don’t forget about shoes, accessories, and seasonal items. This inventory will guide your design decisions and help prioritize features within your budget.
Long hanging space (dresses, coats): Measure your longest items and add 2″ clearance
Double-rod hanging: Typically 40″ for top rod, 40″ for bottom rod
Shelving for folded clothes: 12-16″ depth is ideal
Shoe storage: Allow 7-8″ height per shelf for regular shoes, 12-14″ for boots
Drawers: 24″ width is standard for most clothing items
Setting a Realistic Budget
Professional closet systems can cost $1,000-$5,000 or more, but a DIY approach can slash that to $200-$600 depending on your materials and design choices. Create a spreadsheet to track estimated costs for materials like wood, hardware, paint, and organizational accessories.
The beauty of DIY is flexibility. You can splurge on certain elements that matter most to you while saving on others. My entire closet transformation cost just $250 by using budget-friendly materials and repurposing items I already owned.
– Anne, DIY Enthusiast
Budget-Friendly Materials for Your DIY Closet
The materials you choose will significantly impact both your budget and the final look of your closet. Here are some cost-effective options that don’t sacrifice quality or appearance.
Shelving Options
Melamine Shelving
Pre-finished melamine shelving is affordable, durable, and requires no painting. Available in white and various wood finishes, it’s perfect for DIY closets. A 12″ x 96″ shelf costs around $20-30.
MDF (Medium-Density Fiberboard)
MDF provides a smooth surface that takes paint beautifully. It’s heavier than melamine but less expensive. A 3/4″ 4’x8′ sheet costs approximately $35-45 and can be cut to your specifications.
Quality Shelving Materials
Sturdy shelving is the foundation of a long-lasting DIY closet system.
Don’t skimp on the hardware that supports your shelving and hanging rods. Quality brackets, supports, and rods will ensure your closet remains sturdy for years to come.
Shelf brackets: Look for heavy-duty brackets that can support at least 50 lbs
Closet rods: Metal rods are more durable than plastic and worth the slight cost increase
Rod supports: Place these every 32″ to prevent sagging with heavy clothes
Wall anchors: Essential for secure installation in areas without wall studs
Money-Saving Material Hacks
Pro Tip: Check the “cull lumber” or “damaged goods” section at home improvement stores. These slightly imperfect materials are often discounted 50-70% and work perfectly for closet systems where many imperfections will be hidden from view.
Consider these budget-friendly alternatives that can dramatically reduce your costs:
Repurpose old bookcases or dressers as built-in storage units
Use tension rods for smaller hanging sections (under 36″ wide)
Explore thrift stores for organizational bins and baskets
Check online marketplaces for people selling unused closet components
Use PVC pipe painted with metal spray paint as an alternative to metal closet rods
Designing Your Walk-In Closet Layout
A well-designed layout maximizes every inch of your closet space while keeping items accessible. Let’s explore some efficient design strategies that work well in budget DIY projects.
Maximizing Vertical Space
One of the biggest mistakes in closet design is failing to use the full height of the space. Install shelving all the way to the ceiling, using the highest shelves for seasonal or rarely used items.
Double-Rod Hanging Sections
Double the hanging capacity by installing two rods in sections where you store shirts, blouses, and folded pants. The top rod should be about 80″ from the floor, with the second rod 40″ from the floor. This simple strategy can instantly double your hanging space.
Closet Rod Hardware
Quality closet rods and supports ensure your clothes hang properly and your system remains sturdy.
Plywood or MDF with trim, drawer slides, LED lighting
Step-by-Step Construction Guide
Now that you’ve planned your design and gathered materials, it’s time to build your budget-friendly walk-in closet. This section breaks down the process into manageable steps.
Preparing Your Space
Start with a clean slate by removing existing shelving and hardware. Patch any holes in the walls and consider a fresh coat of paint before installing your new system.
Remove all items from your closet and store them temporarily
Take down existing shelving, rods, and hardware
Patch holes with spackling compound and sand smooth
Clean walls thoroughly to remove dust and debris
Apply a fresh coat of paint if desired (light colors make the space feel larger)
Wall Repair Essentials
Proper wall preparation ensures your new closet system will have a solid foundation.
The foundation of your closet system is the wall-mounted supports. These must be securely attached to wall studs for maximum strength.
Locate and mark wall studs using a stud finder
Determine heights for your shelving and hanging rods
Install horizontal support cleats by screwing them directly into wall studs
Use a level to ensure all supports are perfectly straight
Install vertical side panels if your design includes them
Safety First: Always use a stud finder to locate wall studs. Shelving attached only to drywall will eventually pull out, potentially causing injury and damage to your clothes and closet.
Building Custom Shelving
Custom shelving gives your closet a high-end look without the high-end price tag. Here’s how to create shelving that fits your space perfectly:
Measure and mark your shelving dimensions on the melamine or MDF boards
Cut boards to size using a circular saw with a fine-tooth blade
Sand any rough edges smooth
Apply edge banding to exposed edges if using melamine (this gives a finished look)
Position shelves on your support cleats and secure with screws from underneath
DIY Cutting Tools
The right tools make cutting shelving materials precise and safe.
Hanging rods should be securely installed to support the weight of your clothes without sagging. Standard placement is 66-68″ from the floor for single rods, or 80″ and 40″ for double-rod systems.
Cut closet rods to length (measure between supports and subtract 1/4″)
Install rod end supports, ensuring they’re level and at the correct height
Add center supports every 32″ for rods longer than 36″
Snap rods into place and test by hanging a few heavy items
Budget-Friendly Organization Solutions
The finishing touches make your DIY walk-in closet truly functional. These affordable organization solutions will maximize your space and keep everything accessible.
Drawer and Bin Options
Custom drawers can be expensive and complicated to build. Consider these budget-friendly alternatives:
Canvas or fabric storage bins that slide onto shelves
Repurposed dresser drawers mounted on simple slides
Plastic drawer units that fit within your shelving system
Wire baskets on slides for visibility and airflow
Storage Bins & Organizers
The right storage containers keep your closet neat and maximize space efficiency.
Shoes can quickly become a cluttered mess in any closet. Try these inexpensive shoe storage solutions:
Angled Shoe Shelves
Create simple angled shelves (just a 5-degree tilt) to display shoes while maximizing visibility. Each pair needs about 6-8″ of width and 10-12″ of depth.
Over-Door Organizers
Utilize the back of your closet door with an over-door shoe organizer. These cost $10-20 and can hold 12-24 pairs of shoes without taking up any shelf space.
Accessory Organization
Small accessories like belts, scarves, and jewelry need specialized storage to stay organized. Try these budget-friendly ideas:
Install hooks on the side walls for belts, ties, and scarves
Use shower curtain rings on a tension rod for scarf storage
Repurpose ice cube trays in drawers for small jewelry
Mount pegboard for flexible, customizable accessory storage
Closet Accessory Organizers
Keep your accessories tangle-free and easily accessible with specialized organizers.
Small details make a big difference in the final look of your closet:
Replace basic knobs with decorative handles on drawers and doors
Add crown molding to the top of shelving units for a built-in look
Install a small mirror for outfit checks
Add a decorative stool or ottoman if space allows
Paint and Color Strategies
Strategic use of color can make your budget closet look more expensive:
Light Colors
White, cream, or light gray make the space feel larger and brighter. These neutral colors also provide a clean backdrop that makes your clothes stand out.
Accent Colors
Add personality with a bold accent wall or colorful bins and baskets. This adds visual interest without permanent commitment.
Real-Life Budget Closet Transformations
Let’s look at some inspiring examples of DIY walk-in closet transformations completed on tight budgets. These real projects demonstrate what’s possible with careful planning and creativity.
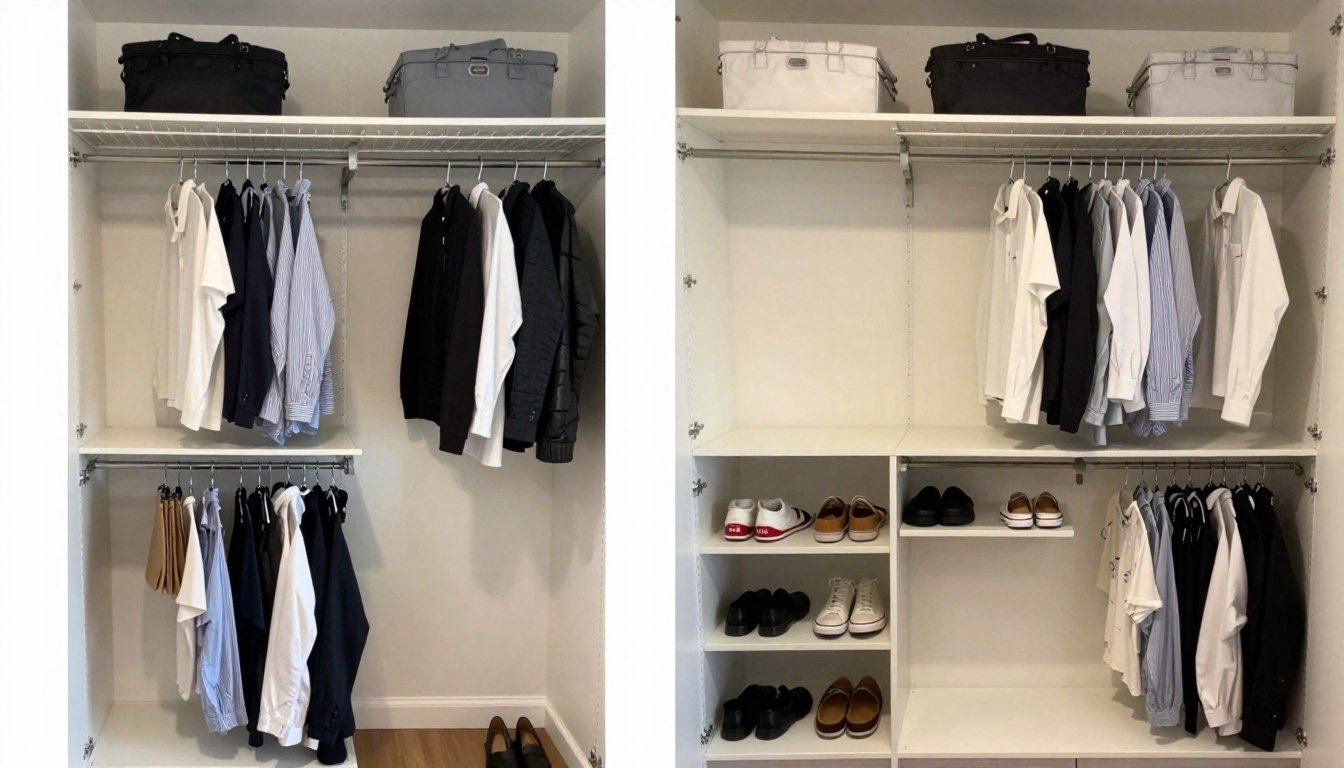
Small Walk-In Transformation: $200 Total
This 5′ x 6′ walk-in closet was transformed using melamine shelving, metal closet rods, and fabric storage bins. The homeowner saved money by:
Reusing the existing paint and flooring
Building simple shelving without drawers
Using fabric bins instead of custom drawers
Installing the entire system themselves over a weekend
L-Shaped Closet Makeover: $350 Total
This awkward L-shaped closet was maximized with a custom design that worked around the unusual dimensions. Key budget strategies included:
Using MDF painted white instead of more expensive materials
Creating a shoe wall with simple angled shelves
Installing inexpensive LED strip lighting
Completing the project in phases to spread out the cost
I was quoted $1,800 for a custom closet system, but I built mine for just $350 using materials from the home improvement store. The key was taking my time with the planning and being willing to learn basic carpentry skills. The result is exactly what I wanted at a fraction of the cost.
– Michael, DIY Homeowner
Start Your Budget-Friendly Closet Transformation Today
Creating a DIY walk in closet on a budget is absolutely achievable with some planning, basic tools, and creativity. The satisfaction of designing and building a custom storage solution that perfectly fits your needs—while saving hundreds or even thousands of dollars—makes this project especially rewarding.
Remember that you don’t have to complete everything at once. Many successful DIY closet transformations happen in phases, allowing you to spread out the cost and adjust your design as you go. Start with the essential framework and hanging space, then add specialized storage and decorative elements over time.
Ready to Transform Your Closet?
Get started with the essential supplies for your budget-friendly DIY walk-in closet project.
Your perfect, organized closet is within reach—without the designer price tag. Take that first measurement today, and you’ll be on your way to a beautiful, functional space that makes getting dressed a joy rather than a chore.
Growing your own herbs brings a special joy to cooking and gardening alike. Whether you have a sprawling backyard or just a tiny apartment windowsill, there’s a herb planter idea perfect for your space. Fresh herbs add vibrant flavors to your meals and delightful fragrances to your home. We’ve gathered 30 inspiring herb planter ideas…
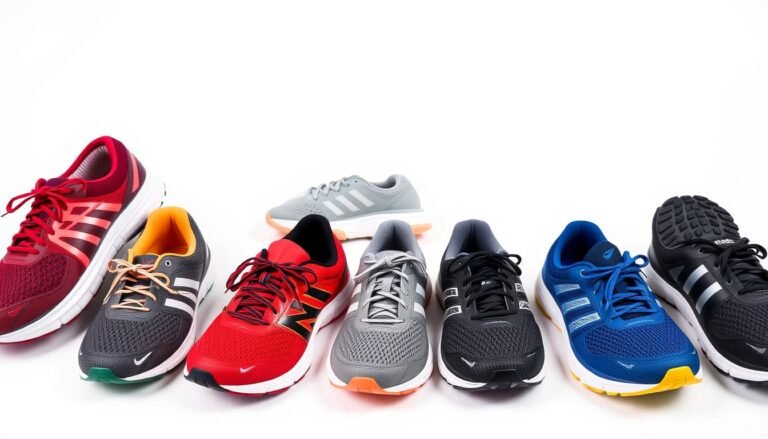
Finding the right running shoes isn’t just about style or brand—it’s about understanding your unique running profile, foot mechanics, and training needs. With the right pair, you’ll not only enhance your performance but also protect yourself from potential injuries. Whether you’re a seasoned marathoner or just starting your running journey, this comprehensive guide will help…
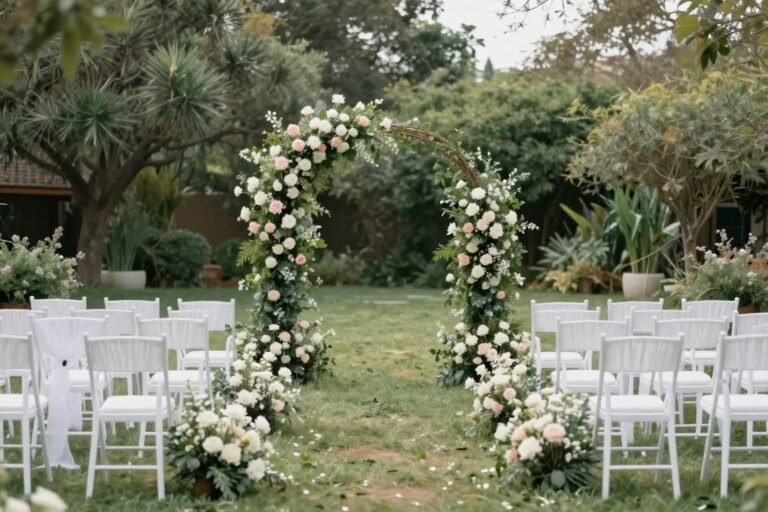
Finding the perfect plus size wedding guest dress that flatters your curves, suits the occasion, and makes you feel confident can be a delightful journey. Whether you’re attending a black-tie affair, a garden celebration, or a casual beach wedding, this comprehensive guide will help you navigate dress codes, understand flattering silhouettes, and discover stunning options…
Planning a wedding with a smaller guest list opens doors to creativity and personal touches that larger events simply cannot achieve. Intimate weddings transform your celebration into something truly meaningful where every detail reflects your unique love story. These smaller gatherings create space for genuine connections with your closest friends and family members.This Website contains…
Planning a wedding with fewer guests opens a world of creative opportunities that larger celebrations simply cannot match. Micro weddings have transformed from necessity to preference for many couples who value meaningful connections over massive guest lists. These intimate gatherings typically include 20 to 50 people, allowing you to focus your time, energy, and budget…
Graduation day marks a momentous milestone in your academic journey. After years of hard work, late-night study sessions, and countless memories, you deserve to look and feel your absolute best as you walk across that stage. Finding the perfect college graduation dress is about balancing style, comfort, and appropriateness for this significant occasion. Whether you’re…