DIY Self Watering Planter: Never Kill Your Plants Again
Tired of coming home to wilted, sad-looking plants? A self watering planter might be exactly what you need. These clever containers create a reservoir of water that your plants can access as needed, keeping them perfectly hydrated for days or even weeks without your intervention. Perfect for busy schedules, frequent travelers, or anyone who’s accidentally turned their green friends into brown memories.
This Website contains affiliate links. That means I may earn a small commission if you purchase through my links, at no extra cost to you.
The best part? You can make your own DIY self watering planter with simple, affordable materials in just an afternoon. No special skills required—just follow our straightforward guide below. You’ll save money compared to store-bought versions while creating a custom solution for your specific plants and space.
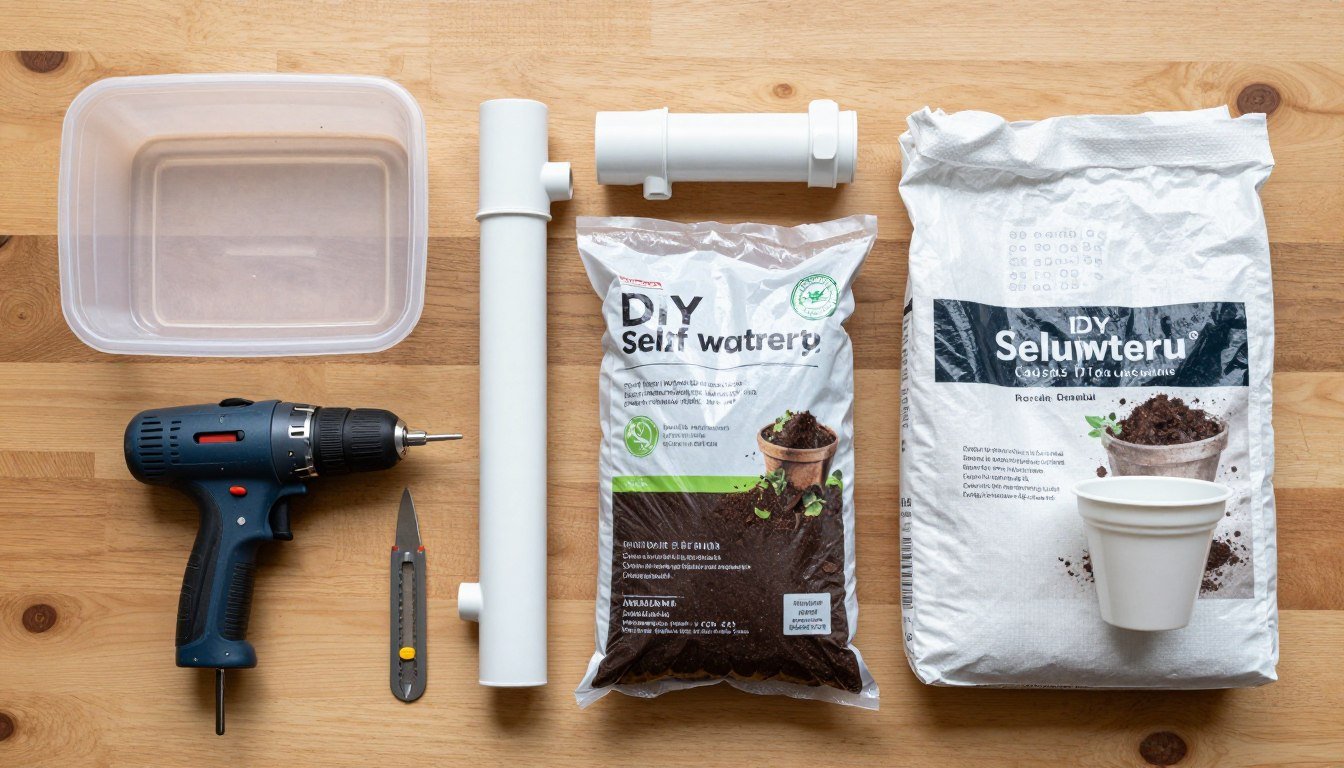
Materials You’ll Need for Your DIY Self Watering Planter
Before you begin, gather these supplies. Most are available at your local hardware store, or you can find them online. I’ve included Amazon search links for your convenience.
How Self Watering Planters Work: The Science Behind the Magic
Before we dive into construction, let’s understand how a self watering planter actually works. The system has three main components:
Water Reservoir: A space at the bottom of the container that holds water.
Wicking System: A “soil foot” or wick that draws water up from the reservoir into the soil above.
Separation Layer: A barrier with holes that keeps most of the soil above the water while allowing the wicking system to pass through.
The magic happens through capillary action—the same process that pulls water up through plant roots. As your plant uses moisture from the soil, the dry soil pulls water up through the wick from the reservoir below, maintaining perfect moisture levels without waterlogging. It’s like giving your plants the ability to drink exactly when they’re thirsty!
Step-by-Step Guide to Building Your Self Watering Planter
Step 1: Prepare Your Container
Start by selecting a container that’s deep enough to create both a water reservoir and a planting area. The container should not have any drainage holes, as we’ll be creating a controlled system.
Measure about ¼ to ⅓ of the height from the bottom—this will be your water reservoir.
Mark this height around the container with a marker.
Drill a small overflow hole (about ¼”) at this marked line. This prevents overwatering by allowing excess water to drain out when the reservoir is full.
Step 2: Create the Separation Layer
The separation layer divides your water reservoir from the soil while allowing the wicking system to pass through.
Take the lid of your container and cut it to fit inside the container at your marked reservoir height line.
Cut a hole in the center of this modified lid large enough to fit your small plastic pot or pond basket.
If using a rectangular container, cut a small notch in one corner for the PVC pipe to pass through.
Step 3: Prepare the Watering Pipe
The watering pipe allows you to refill the reservoir without disturbing your plants.
Cut your PVC pipe to a length that will reach from the bottom of your container to about 1-2 inches above the top.
Cut a 45-degree angle at the bottom end of the pipe to prevent it from sitting flat against the container bottom.
Optional: Cover the bottom opening with landscape fabric secured with a rubber band to prevent soil from entering.
Step 4: Create the Wicking System
The wicking system is the heart of your self watering planter—it’s what draws water up to your plants’ roots.
Take your small plastic pot (make sure it has drainage holes) or pond basket.
If using a pot with few holes, add more by carefully drilling or poking additional holes around the sides.
Fill the pot with slightly moistened potting soil, packing it firmly.
For even better wicking, use a 2:1 mixture of vermiculite and peat moss in this pot instead of regular potting soil.
Step 5: Assemble the Planter
Now it’s time to bring all the pieces together:
Place your modified container lid (separation layer) inside the container, resting at your marked line.
Insert the wicking pot through the center hole so it touches the bottom of the container.
Position the PVC pipe through the corner notch, ensuring it reaches the bottom.
Line the top portion with landscape fabric to prevent soil from falling into the reservoir. The fabric should cover the separation layer but allow the top of the wicking pot to remain exposed.
Step 6: Add Soil and Plant
With your self watering system assembled, it’s time to add soil and plants:
Fill the container with quality potting mix up to about 1 inch below the rim.
Make sure the soil connects well with the soil in the wicking pot for proper moisture transfer.
Plant your chosen plants as you normally would, being careful not to damage the watering pipe.
Water thoroughly from the top for initial planting to help establish roots.
Step 7: Fill the Reservoir and Maintain
Your DIY self watering planter is now ready to use:
Pour water through the PVC pipe until you see water coming out of the overflow hole.
For the first week, also water from the top to help establish plants.
After that, simply refill the reservoir when needed—typically every 3-7 days depending on plant type, container size, and weather conditions.
Check the soil moisture occasionally by inserting your finger about 2 inches into the soil—it should feel consistently moist but not soggy.
Optional Upgrade: Adding an Aeration System
For even healthier plants, consider adding a simple aeration system to your water reservoir. This prevents stagnant water and provides oxygen to plant roots.
Drill a small hole near the bottom of the container (in the reservoir area).
Feed the air tubing through this hole.
Attach the air stone to the end inside the reservoir.
Connect the other end to the air pump outside the container.
Seal around the tubing with waterproof silicone or hot glue.
Run the pump for a few hours each day to keep the water fresh and oxygenated. This is especially beneficial for plants with high water needs or in warm climates where water can become stagnant quickly.
Best Plants for Your DIY Self Watering Planter
Not all plants are equally suited for self watering planters. Here are some recommendations based on water needs:
Ideal Choices
Herbs: Basil, mint, parsley
Leafy greens: Lettuce, spinach, kale
Houseplants: Pothos, spider plants, peace lilies
Flowers: Impatiens, petunias, marigolds
Can Work With Adjustments
Tomatoes (cherry varieties)
Peppers
Cucumbers
Strawberries
African violets
Avoid These Plants
Succulents and cacti
Orchids
Rosemary
Lavender
Plants prone to root rot
For vegetables and fruiting plants, choose determinate or compact varieties that won’t outgrow your container. If you’re growing multiple plants in one container, make sure they have similar water requirements.
Maintaining Your DIY Self Watering Planter
Your DIY self watering planter needs minimal maintenance, but these tips will keep it functioning optimally:
Regular Maintenance:
Check water levels every few days until you learn your plants’ consumption rate.
Clean the PVC pipe occasionally to prevent algae buildup.
Flush the reservoir completely every 2-3 months to prevent salt buildup.
Check that the overflow hole isn’t blocked.
Seasonal Care:
In hot weather, check water levels more frequently.
In winter, reduce watering for dormant plants.
Replace soil annually or when changing plants.
Store empty containers indoors during freezing weather to prevent cracking.
Fertilizing Your Self Watering Planter
Since nutrients can be depleted faster in self watering systems, proper fertilization is important:
Use water-soluble fertilizer at half strength when filling the reservoir.
Alternatively, mix slow-release organic fertilizer into the top few inches of soil.
Avoid putting fertilizer directly into the reservoir without dilution, as this can lead to salt buildup and harm roots.
Every 2-3 months, flush the system with clean water to remove any mineral buildup.
Troubleshooting Common Issues
Plants are wilting despite water in the reservoir
This usually indicates a wicking problem. Check that:
The wicking pot is making good contact with the bottom of the container
The soil in the wicking pot is packed firmly enough
The soil above connects well with the wicking pot soil
Try adding more vermiculite to the wicking pot to improve capillary action
Water level doesn’t seem to be decreasing
If plants look healthy, this isn’t necessarily a problem—some plants use less water. However, if plants are struggling:
Ensure the wicking pot has enough drainage holes
Check that the reservoir isn’t sealed off from the wicking system
Consider that your plants might not need much water (like herbs or small flowers)
Soil surface is very dry but plants are drooping
This is normal for self watering planters—the surface often stays dry while moisture is available deeper. However:
Check moisture levels by inserting your finger 2-3 inches into the soil
If dry at that depth, the wicking system may not be working properly
Some plants with shallow roots may need occasional top watering until established
Algae or foul smell from the reservoir
This indicates stagnant water or excess nutrients:
Completely drain and flush the system
Consider adding the aeration system described earlier
Use opaque containers to block light from the reservoir
Reduce the amount of fertilizer you’re adding to the water
Share Your DIY Self Watering Planter on Pinterest
Ready to share your creation with the world? Here are some tips for capturing your DIY self watering planter for Pinterest:
Pin-Worthy Photo Ideas
Take these shots of your DIY self watering planter to create engaging Pinterest pins:
Before and after: materials laid out, then the finished planter
Step-by-step collage showing the key construction phases
Close-up of the wicking system and water reservoir
Your thriving plants after a few weeks in their new home
Share with fellow DIY enthusiasts who love creating practical projects for their homes.
Gardening Hacks
Perfect for boards focused on clever solutions and time-saving ideas for gardeners.
Indoor Gardening
Ideal for pinners interested in growing plants inside their homes year-round.
Frequently Asked Questions About DIY Self Watering Planters
How often do I need to refill my self watering planter?
This depends on several factors: container size, plant type, and weather conditions. Most setups need refilling every 3-7 days in summer and less frequently in cooler weather. Check the water level by looking through the PVC pipe or using a dipstick until you learn your plants’ consumption rate.
Can I use any container to make a self watering planter?
Almost any container without drainage holes can work, but it should be deep enough to create both a water reservoir and soil space. Food-safe containers are recommended for edible plants. Avoid containers that previously held toxic materials. Opaque containers are better than transparent ones to prevent algae growth in the reservoir.
Do self watering planters cause root rot?
When properly constructed, self watering planters should not cause root rot. The separation layer keeps most roots above the water level, while the wicking system provides consistent moisture without waterlogging. However, plants that prefer dry conditions (like succulents or cacti) are not good candidates for self watering planters.
Can I use self watering planters outdoors?
Yes! They work great outdoors and can actually save water compared to traditional planters. Just be aware that heavy rain can fill the reservoir beyond capacity. You may want to cover the PVC pipe during rainstorms or drill additional overflow holes for outdoor use. In freezing temperatures, bring containers indoors or empty the reservoir to prevent damage.
What type of potting mix works best in self watering planters?
Use a high-quality potting mix designed for containers, not garden soil. Look for mixes containing perlite, vermiculite, or coco coir, which help with both water retention and drainage. For the wicking pot specifically, a mixture of vermiculite and peat moss (2:1 ratio) works exceptionally well for drawing water upward.
Start Enjoying the Benefits of Your DIY Self Watering Planter
Congratulations! You’ve successfully created your own DIY self watering planter that will keep your plants happy and hydrated with minimal effort from you. This simple system works with the natural processes of plants to provide consistent moisture exactly when needed.
Remember that different plants have different water needs, so observe how your plants respond and adjust accordingly. The beauty of this system is its flexibility—you can easily modify it for different plants, container sizes, or growing conditions.
Share Your Success!
We’d love to see your DIY self watering planter creations! Share photos on social media with the hashtag #DIYSelfWateringPlanter or pin your results to Pinterest to inspire others.
Your wedding reception is where memories are made, laughter is shared, and love is celebrated. The right wedding reception decorations can transform an ordinary venue into a magical wonderland that reflects your unique style and love story. Whether you’re dreaming of an elegant ballroom affair, a rustic barn celebration, or a whimsical garden party, the…
Creating a beautiful garden doesn’t require acres of land or a hefty bank account. With some creativity and smart planning, you can transform even the tiniest outdoor space into a lush oasis that looks like a million bucks. These small garden ideas on a budget will help you maximize your space, minimize your spending, and…
Pastel bridesmaid dresses create a soft, romantic atmosphere that transforms your wedding day into a fairytale celebration. These gentle hues bring an ethereal quality to your bridal party while offering versatility across seasons and venues. Whether you’re planning a spring garden ceremony or a summer beach wedding, pastel bridesmaid dresses provide the perfect canvas for…
Creating stunning planter arrangements is an art form that combines color, texture, and plant varieties to transform ordinary containers into extraordinary focal points. Whether you’re decorating a porch, patio, or indoor space, the right combination of plants can create a lush, professional-looking display that brings joy throughout the seasons. In this guide, we’ll explore the…
Your bridesmaids play a special role on your big day. These incredible women stand beside you during one of life’s most important moments. Capturing beautiful bridesmaids photos preserves these memories forever.This Website contains affiliate links. That means I may earn a small commission if you purchase through my links, at no extra cost to you….
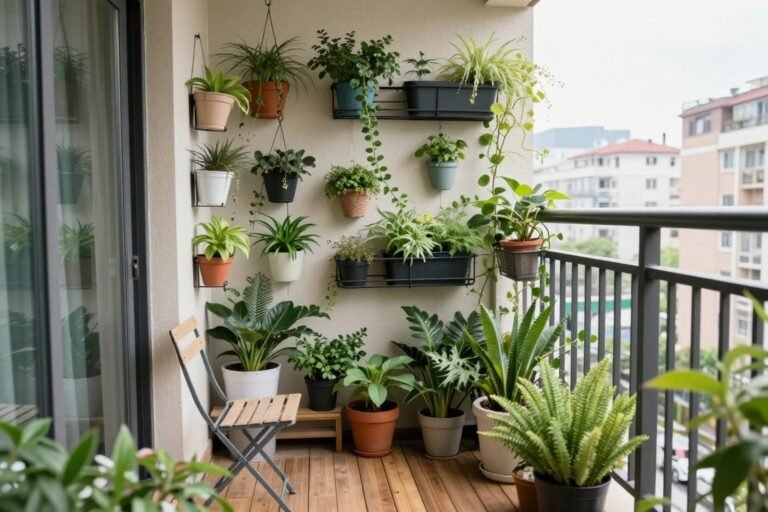
A mini balcony doesn’t have to limit your creativity or outdoor enjoyment. With thoughtful design and smart solutions, even the smallest balcony can become a stylish retreat that feels like an extension of your home. Whether you dream of a cozy reading nook, a vertical garden oasis, or a chic dining spot, these mini balcony…