DIY Privacy Fence on a Budget: 15 Affordable Ideas
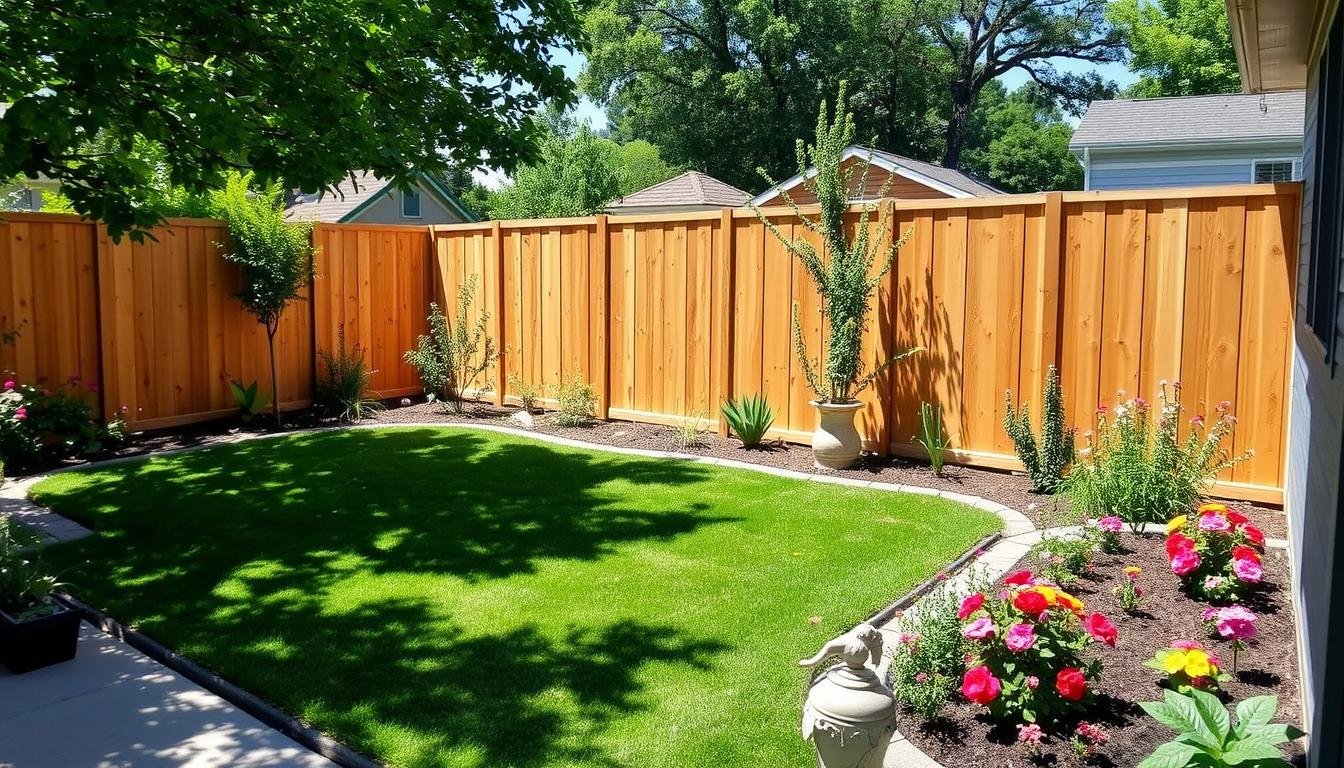
Creating privacy in your backyard doesn’t require a professional contractor or thousands of dollars. With smart planning and the right materials, you can build a stunning privacy fence yourself while staying within budget. Whether you want to block noise from neighbors, create a safe space for children and pets, or simply add visual appeal to your property, affordable fencing options exist for every home.
This comprehensive guide walks you through budget-friendly fence ideas that deliver both function and style. You’ll discover material choices that won’t strain your wallet, learn installation techniques that save on labor costs, and find creative design solutions that maximize your investment.
The beauty of a DIY approach lies in complete control over your project. You choose materials that match your style, work at your own pace, and avoid expensive contractor fees. From classic wood fence panels to innovative pallet designs, the possibilities are endless when you’re willing to get your hands dirty.
Why Choose Budget-Friendly Privacy Fencing
Budget fencing doesn’t mean sacrificing quality or appearance. Modern materials and smart design allow homeowners to create beautiful boundaries at a fraction of traditional costs. Understanding the benefits helps you make informed decisions about your project.
The primary advantage of DIY fencing is substantial cost savings. Professional installation typically doubles or triples your total expense. By handling the work yourself, you invest only in materials and basic tools. This approach makes privacy accessible to homeowners on any budget.
Control over design represents another significant benefit. You’re not limited to contractor packages or standard options. Mix materials, adjust height, incorporate decorative elements, and customize every detail to match your vision. This creative freedom results in truly unique outdoor space.
Advantages of Budget Fencing
Significant cost savings on labor and materials
Complete design control and customization
Flexible timeline based on your schedule
Skill development and DIY satisfaction
Easy future repairs and modifications
Material variety for every style preference
Considerations to Keep in Mind
Time investment for planning and building
Physical labor requirements
Learning curve for certain techniques
Tool purchase or rental needs
Permit requirements in some areas
Weather-dependent installation schedule
Budget fencing also offers flexibility in project timeline. Work on weekends, spread the project across months, or complete it quickly if time allows. This adaptability fits busy schedules and prevents financial strain from large upfront payments.
Wooden pallets represent the most economical fencing material available. Many businesses give them away free, and others sell them for minimal cost. This option transforms discarded shipping materials into attractive privacy barriers.
Pallet fences work exceptionally well for temporary privacy needs or rental properties. The material is lightweight, easy to work with, and requires minimal tools. Basic construction skills and a few hours of work create functional boundaries.
Building Your Pallet Privacy Fence
Start by sourcing quality pallets from local businesses, warehouses, or distribution centers. Look for heat-treated wood marked with “HT” stamps, which indicates safe, chemical-free treatment. Avoid pallets marked “MB” as these contain harmful methyl bromide.
Inspect each pallet carefully for damage, rot, or excessive wear. Strong, intact boards ensure fence longevity. Plan to collect more pallets than initially calculated to account for damaged pieces and design adjustments.
Essential Pallet Fence Materials
Gather everything you need to start your pallet fence project. These basic supplies keep costs low while delivering solid results.
Installation begins with setting sturdy posts every six to eight feet. Pressure-treated posts resist rot and provide strong anchors for pallet panels. Dig holes at least two feet deep, place posts, and secure with concrete for maximum stability.
Attach pallets vertically or horizontally depending on desired look and privacy level. Vertical placement creates taller fences with narrower boards. Horizontal orientation produces a more traditional appearance with easier installation.
Finishing and Maintaining Pallet Fences
Unfinished pallet wood weathers naturally to attractive gray tones. For enhanced protection and customized color, apply exterior paint or stain. Light colors brighten small spaces, while dark tones create dramatic backdrops for garden plants.
Sealing pallet wood extends fence life significantly. Water-repellent sealers protect against moisture damage, warping, and insect infestation. Reapply every two to three years for best results.
Traditional Wood Fence Panels for Classic Privacy
Wood fence panels remain the most popular privacy solution for good reason. They offer excellent privacy, natural beauty, and reasonable material cost when purchased strategically. Pre-made panels simplify installation while custom-built options provide design flexibility.
Cedar and pine represent the most budget-friendly wood options. Cedar naturally resists rot and insects, requiring less maintenance over time. Pine costs less initially but needs regular sealing and treatment to prevent decay.
Choosing the Right Wood Panels
Standard fence panels come in various heights, with six-foot panels providing complete privacy for most applications. Eight-foot panels work well for added security or blocking second-story views. Consider your specific privacy needs before purchasing.
Panel styles range from solid board designs to shadowbox patterns with slight gaps. Solid panels block all visibility and reduce noise effectively. Shadowbox styles allow air circulation while maintaining privacy from most angles.
Solid Board Panels
Boards placed side-by-side with no gaps create complete visual barriers. This design offers maximum privacy and wind protection. Ideal for properties near busy streets or close neighbors.
Complete privacy coverage
Excellent noise reduction
Strong wind resistance
Traditional appearance
Shadowbox Panels
Alternating boards on both sides with small gaps provide privacy while allowing airflow. This style looks attractive from both sides of the fence. Better choice for windy locations.
Good privacy with ventilation
Attractive from both sides
Wind passes through safely
Dimensional visual interest
Purchase pre-assembled panels from home improvement stores for quickest installation. These ready-made options speed up your project significantly. Custom-building panels from individual boards costs less but requires more time and carpentry skills.
Wood Fence Panel Shopping Guide
Find quality fence panels and installation supplies to create your privacy barrier. Compare options to fit your specific needs and budget.
Proper post placement ensures fence stability and longevity. Mark your fence line with string and stakes before digging. Space posts according to panel width, typically eight feet apart for standard panels.
Set posts in concrete for maximum strength. Mix concrete according to package directions, pour around posts, and allow full curing time before attaching panels. This foundation prevents leaning and extends fence life.
Attach panels using galvanized screws or fence brackets designed for this purpose. Screws provide stronger hold than nails and won’t pop out over time. Work with a helper to hold panels level during installation.
Picket Fence Modifications for Added Privacy
Traditional picket fences typically serve decorative purposes rather than privacy needs. However, creative modifications transform these charming barriers into functional privacy screens while maintaining their classic appeal.
Close-spaced picket designs reduce gaps between boards for better privacy. Instead of traditional four-inch spacing, place pickets two inches apart or closer. This modification maintains the picket aesthetic while blocking views effectively.
Increasing Picket Fence Height
Standard picket fences stand three to four feet tall, insufficient for privacy purposes. Extend picket height to six feet or more for adequate screening. Taller pickets require stronger posts and rails to support the additional weight and wind resistance.
Consider varying picket heights to create interesting visual patterns. Alternating heights add dimension while maintaining privacy. This design choice makes your fence a garden focal point rather than a plain barrier.
Paint color dramatically affects picket fence appearance and privacy level. White picket fences remain classic choices that complement any home style. Dark colors create stronger visual barriers and make fences appear more solid.
Picket Fence Supplies
Source materials for building or modifying your picket fence. Quality components ensure your fence stands strong for years.
Strategic landscaping enhances picket fence privacy without major structural changes. Plant climbing vines along the fence to fill gaps naturally. Ivy, clematis, and climbing roses create living privacy screens over time.
Shrubs planted in front of picket fences add privacy layers while softening the overall look. Choose varieties that reach desired heights without constant trimming. Evergreen shrubs provide year-round coverage in most climates.
Chain Link Fence Privacy Upgrades
Chain link fencing costs significantly less than other options, making it extremely budget-friendly. While standard chain link offers no privacy, simple additions transform it into an effective privacy barrier without replacing the entire fence.
Privacy slats insert through chain link mesh to block visibility completely. These plastic or metal strips come in various colors to match your home’s exterior or blend with landscaping. Installation requires no special tools or skills.
Privacy Slat Installation Methods
Vertical slats weave through chain link wire in alternating patterns. This method creates solid coverage when slats are spaced correctly. Follow manufacturer instructions for proper weaving technique to ensure uniform appearance.
Horizontal slat systems attach to fence framework using clips or ties. These options install faster than woven varieties but may show more gaps. Choose styles with overlapping edges for better privacy coverage.
Color selection affects your fence’s visual impact on the property. Green slats blend with garden landscapes naturally. Brown or tan options create neutral backgrounds. White or beige brightens shaded areas.
Chain Link Privacy Solutions
Upgrade your existing chain link fence with affordable privacy additions. These solutions work with any chain link installation.
Privacy screening fabric attaches to chain link wire using zip ties or clips. These mesh screens block wind and provide privacy while allowing some air circulation. Material options include vinyl-coated polyester and high-density polyethylene.
Living screens offer natural privacy for chain link fences. Plant fast-growing vines like morning glory or sweet peas along the fence base. These climbing plants cover chain link completely within one growing season.
Bamboo reed fencing rolls attach to chain link frameworks quickly. Natural materials blend beautifully with outdoor spaces. UV-resistant synthetic bamboo provides similar aesthetics with less maintenance.
Corrugated Metal Panels for Modern Privacy
Metal fencing creates contemporary privacy barriers at surprisingly affordable prices. Corrugated steel or aluminum panels offer industrial-chic aesthetics that complement modern home designs. This material requires minimal maintenance and lasts decades.
Corrugated panels come pre-finished in various colors and textures. Choose from galvanized steel for raw industrial looks, or powder-coated options in colors matching your home’s exterior. Rust-resistant coatings ensure lasting beauty.
Installing Metal Panel Fences
Metal panels attach to wooden or steel posts using self-tapping screws. Pre-drill holes to prevent panel cracking during installation. Overlap panels slightly or use trim pieces to cover gaps between sections.
Frame construction determines metal fence stability. Steel posts offer strongest support but cost more than wood options. Pressure-treated lumber posts work well for most residential applications when properly set in concrete.
Panel orientation affects fence appearance significantly. Vertical panels create height emphasis and modern style. Horizontal installation produces contemporary linear designs popular in urban settings.
Metal Fence Installation Tip
Wear protective gloves when handling metal panels. Cut edges are extremely sharp and can cause serious injuries. Use tin snips or a circular saw with metal-cutting blade for clean cuts.
Finishing Touches for Metal Fences
Cap rails add finished looks to metal fence tops while protecting panels from water infiltration. Metal or wood caps attach along the upper edge. This detail elevates the fence from basic to polished.
Soften the industrial appearance with strategic landscaping. Ornamental grasses, modern sculptural plants, or simple groundcovers balance metal’s hard edges. Container gardens placed along fence lines add color and life.
Living Fences: Natural Privacy Solutions
Living fences use plants as primary privacy barriers. While initial installation costs less than traditional fencing, these green walls require time to establish. Patience rewards you with beautiful, eco-friendly privacy that improves annually.
Fast-growing shrubs create privacy screens within two to three years. Popular choices include privet, arborvitae, and Leyland cypress. These varieties tolerate various climates and soil conditions while growing quickly.
Selecting Plants for Living Fences
Evergreen varieties provide year-round privacy unlike deciduous plants that lose leaves seasonally. Consider climate zone requirements before purchasing. Local nurseries stock plants suited to your area’s conditions.
Spacing determines how quickly plants create solid barriers. Plant shrubs closer than recommended mature spread for faster coverage. This technique requires eventual thinning but delivers quicker privacy.
Fast-Growing Privacy Plants
Leyland Cypress – 3-4 feet per year
Privet – 2-3 feet per year
Arborvitae – 1-2 feet per year
Bamboo – 3-5 feet per year
Photinia – 2-3 feet per year
Low-Maintenance Options
Boxwood – tolerates shaping well
Holly – evergreen with berries
Juniper – drought resistant
Yew – shade tolerant
Viburnum – fragrant flowers
Supporting Structures for Climbing Plants
Wire fencing provides affordable support for climbing plants. Install basic welded wire between posts as a framework. Plants cover the structure completely within months, hiding the wire entirely.
Trellis panels offer decorative support for vines and climbing roses. Wooden or metal options work equally well. Space trellis sections along property lines for complete coverage.
Maintenance requirements for living fences include regular watering, occasional fertilizing, and annual pruning. These tasks take less time than painting or staining traditional fences. Established plants become nearly self-sufficient.
Step-by-Step DIY Fence Installation
Successful fence installation follows systematic processes regardless of material choice. Proper planning and execution ensure your fence stands strong and looks professional. These steps apply to most fence types with minor variations.
Planning and Preparation
Check local building codes and permit requirements before starting any fence project. Many municipalities regulate fence height, setback distances, and placement. Obtain necessary permits to avoid future legal issues or removal orders.
Mark property lines accurately using survey stakes or property documents. Building on neighboring property creates serious legal problems. When in doubt, hire a professional surveyor to establish exact boundaries.
Call utility companies to mark underground lines before digging. This free service prevents dangerous accidents and costly damage to electrical, gas, or water lines. Most areas require this step by law.
Research local fence regulations and obtain permits
Verify exact property boundaries
Contact utility marking services
Calculate materials needed with 10% overage
Gather or rent necessary tools
Clear fence line of vegetation and obstacles
Essential Installation Tools
Equip yourself with the right tools for professional fence installation results. Quality tools make the job easier and faster.
Post installation determines fence quality and longevity more than any other factor. Take time to set posts properly even if it slows your project. Straight, stable posts make panel installation much easier.
Dig post holes three times the post diameter and one-third the post height deep. For six-foot tall fences, dig holes two feet deep minimum. Rocky or sandy soil may require deeper holes for stability.
Place posts in holes and check for plumb using a level on two adjacent sides. Brace posts temporarily with scrap lumber. Pour concrete mix around posts, eliminating air pockets by poking with a stick.
Allow concrete to cure fully before continuing installation. Most concrete reaches working strength in 24-48 hours but achieves maximum strength after seven days. Patience during curing prevents tilted posts later.
Attaching Panels and Finishing
Start panel installation at a corner or gate location. Work systematically along the fence line, maintaining consistent height throughout. Use a string line stretched between end posts as a guide.
Secure panels with appropriate fasteners for your material type. Wood panels use galvanized screws, metal panels need self-tapping screws, and vinyl systems have specialized brackets. Follow manufacturer recommendations.
Add post caps to protect wood from water damage and enhance appearance. Install gate hardware according to kit instructions. Apply finish coats of paint, stain, or sealer as needed for your material choice.
Budget Fence Cost Comparison
Understanding costs helps you choose the best fence option for your budget and needs. Prices vary by region, material quality, and fence height. These estimates provide general guidance for planning purposes.
Fence Type
Material Cost per Linear Foot
DIY Difficulty
Lifespan
Maintenance Level
Pallet Fence
$2-$5
Easy
5-10 years
Moderate
Chain Link with Slats
$8-$12
Easy
15-20 years
Low
Pine Wood Panels
$10-$15
Moderate
10-15 years
High
Corrugated Metal
$12-$18
Moderate
20-30 years
Low
Cedar Wood Panels
$15-$25
Moderate
15-25 years
Moderate
Living Fence
$8-$20
Easy
50+ years
Moderate
Total project costs depend on fence length and height. A typical backyard fence spanning 100 linear feet costs between $200 for pallet construction and $2,500 for premium cedar. Labor savings through DIY installation represent the largest cost reduction.
Hidden Costs to Consider
Tool purchases or rentals add to project budgets. Post hole diggers, levels, saws, and drills are essential for most fence projects. Renting specialized equipment like power augers costs less than purchasing for one-time use.
Concrete, hardware, and fasteners often get overlooked in initial estimates. Budget approximately 20% of material costs for these items. Quality hardware prevents future problems and repair expenses.
Finishing materials including paint, stain, or sealer add significant costs. Plan for these items from the start rather than treating them as optional. Proper finishing protects your investment and extends fence life.
Money-Saving Strategy
Purchase materials during off-season sales, typically late fall and winter. Home improvement stores offer substantial discounts on fencing supplies when demand drops. Plan your spring installation during winter shopping for maximum savings.
Maintaining Your Budget Privacy Fence
Regular maintenance extends fence life and preserves appearance. Simple care routines prevent costly repairs or premature replacement. Different materials require specific maintenance approaches for best results.
Wood Fence Care
Inspect wood fences annually for damage, rot, or insect infestation. Replace damaged boards promptly to prevent problems from spreading. Check post stability and reinforce as needed with additional concrete or bracing.
Clean wood fences yearly using mild detergent and water. Remove mildew, dirt, and debris that trap moisture against the wood. Power washing works well but use low pressure to avoid damaging wood fibers.
Reapply protective finishes every two to three years depending on climate and exposure. Stain or paint protects wood from moisture, UV damage, and insect activity. Proper finishing significantly extends wood fence lifespan.
Metal Fence Maintenance
Metal fencing requires minimal care compared to wood options. Inspect for rust spots annually and treat immediately with rust converter and touch-up paint. Small rust areas spread quickly if ignored.
Clean metal panels with soap and water to remove dirt and corrosive substances. Rinse thoroughly to prevent water spots. Wax finishes add extra protection and enhance appearance.
Living Fence Care
Prune living fences annually to maintain shape and encourage dense growth. Remove dead or diseased branches immediately. Fertilize according to plant species requirements, typically in early spring.
Water young plants regularly until established. Mature hedges generally survive on natural rainfall except during severe droughts. Mulch around plants to retain moisture and suppress weeds.
Creative Design Ideas for Budget Fences
Unique design elements transform basic fences into landscape features. Creative touches add personality without significant cost increases. These ideas work with any fence material or style.
Color and Paint Techniques
Bold color choices make fences architectural statements. Paint fences in colors that complement home exteriors or create garden backdrops. Dark colors recede visually, making small yards appear larger.
Two-tone designs add visual interest to plain fences. Paint alternating panels or sections in contrasting colors. Horizontal stripes create width illusions in narrow spaces.
Stenciled patterns transform basic wood fences into decorative features. Geometric designs, nature motifs, or custom graphics personalize your space. Use exterior paint and stencils for weather-resistant artwork.
Integrated Planting Solutions
Built-in planters along fence bases soften hard edges while adding color. Construct simple wooden boxes or use purchased containers. Fill with flowers, herbs, or small shrubs that complement fence style.
Attach planter boxes directly to fence panels for vertical gardens. This technique maximizes growing space in small yards. Use lightweight containers to avoid stressing fence structure.
Train climbing vines on wire or trellis attached to fence panels. This living decoration evolves seasonally and provides additional privacy. Choose non-invasive varieties that won’t damage fence materials.
Lighting Integration
Solar lights mounted on fence posts illuminate pathways and enhance security. No wiring required makes this the easiest lighting option. Choose styles matching your fence design for cohesive appearance.
String lights draped along fence tops create magical evening ambiance. Outdoor-rated LED strings withstand weather while consuming minimal electricity. This affordable addition transforms ordinary backyards into entertainment spaces.
Install low-voltage landscape lighting at fence base to highlight plantings and architecture. Uplighting creates dramatic shadows and depth. Solar or electric options work equally well depending on your preferences.
Understanding Fence Permits and Regulations
Local regulations govern fence height, placement, and construction methods. Understanding requirements prevents costly mistakes and legal issues. Research regulations before purchasing materials or starting construction.
Common Fence Regulations
Height restrictions typically limit backyard fences to six feet and front yard fences to four feet. Some areas allow taller privacy fences with special permits. Corner properties face additional visibility requirements at intersections.
Setback requirements determine how close fences can be to property lines. Most jurisdictions require fences set back six inches to several feet from actual boundaries. Verify exact measurements before installation.
Homeowner associations often impose stricter rules than municipal codes. Review HOA covenants carefully for approved materials, colors, and styles. Submit plans for approval before starting work in HOA communities.
Important Legal Consideration
Building fences without required permits can result in removal orders, fines, and legal liability if accidents occur. Always obtain proper permits even if they seem unnecessary. This small investment protects you legally and financially.
Obtaining Fence Permits
Visit your local building department to learn specific requirements. Staff can explain regulations and provide permit applications. Many jurisdictions now offer online permit applications for convenience.
Submit site plans showing fence location, height, and materials. Include property survey documents proving ownership and boundaries. Permit fees vary by location but typically range from fifty to two hundred dollars.
Inspections may be required during or after construction. Building inspectors verify compliance with codes and approved plans. Schedule inspections according to department requirements to avoid delays or violations.
Building Your Dream Privacy Fence on a Budget
Creating beautiful, functional privacy doesn’t require unlimited funds or professional contractors. Smart material choices, DIY installation, and creative design deliver impressive results within modest budgets. Your backyard transformation starts with careful planning and commitment to the project.
Consider your specific needs when selecting fence materials and design. Budget constraints shouldn’t force compromises on quality or appearance. Options exist for every price point, from free pallet construction to affordable wood panels and modern metal designs.
Take time during the planning phase to research thoroughly and gather inspiration. Proper preparation makes installation smoother and results more professional. Measure accurately, obtain necessary permits, and assemble tools before starting physical work.
DIY installation saves substantial money while providing personal satisfaction and skill development. Work at your own pace, ask for help when needed, and don’t rush critical steps like post setting. Quality installation ensures your fence serves well for many years.
Start Your Fence Project Today
Everything you need to build your budget privacy fence is readily available. Start shopping for materials and make your backyard privacy dreams reality.
Remember that even budget fences require regular maintenance to preserve their appearance and function. Establish simple care routines from the beginning. Annual inspections, cleaning, and touch-ups prevent small issues from becoming expensive problems.
Your DIY privacy fence represents more than a physical barrier. It creates safe space for family activities, defines property boundaries, and adds value to your home. The pride of completing this project yourself makes it even more rewarding. Start planning today and enjoy your private backyard oasis for years to come.
Backdrop decorations have become essential elements for creating memorable events and photo-worthy moments. Whether you’re planning a wedding, birthday celebration, baby shower, or professional photoshoot, the right backdrop can elevate your event from ordinary to extraordinary. These versatile design elements set the tone, create atmosphere, and provide the perfect canvas for capturing memories. From elegant…
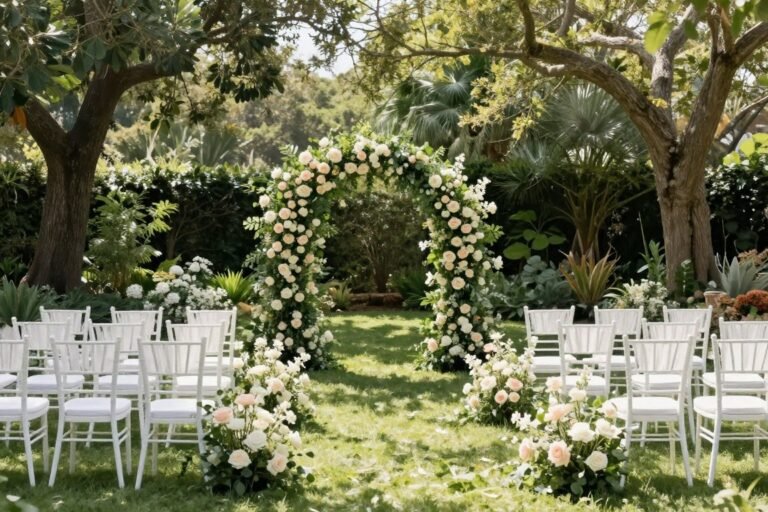
Planning an outdoor wedding opens a world of possibilities that indoor venues simply cannot match. The natural beauty surrounding you creates an enchanting backdrop that needs minimal decoration. Fresh air, open skies, and the gentle sounds of nature set a romantic tone that your loved ones will remember forever. Your wedding day deserves a setting…
Your wedding tables set the stage for one of life’s most memorable celebrations. The right table decor creates an atmosphere that reflects your love story while delighting every guest who sits down to celebrate with you. Wedding table decoration transforms ordinary reception spaces into extraordinary experiences. Whether you envision romantic candlelit elegance or vibrant bohemian…
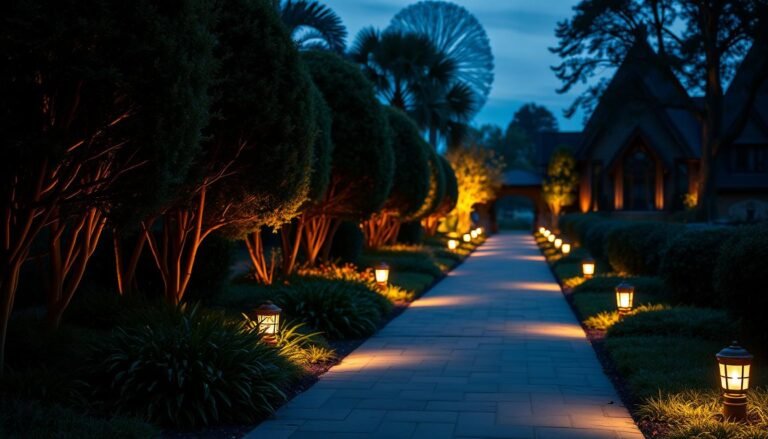
The right landscape lighting can transform an ordinary yard into a magical nighttime retreat. Beyond basic illumination, thoughtful lighting design adds depth, drama, and dimension to your outdoor spaces while enhancing safety and security. Whether you’re looking to highlight architectural features, create ambient gathering areas, or simply make your garden pathways safer to navigate after…
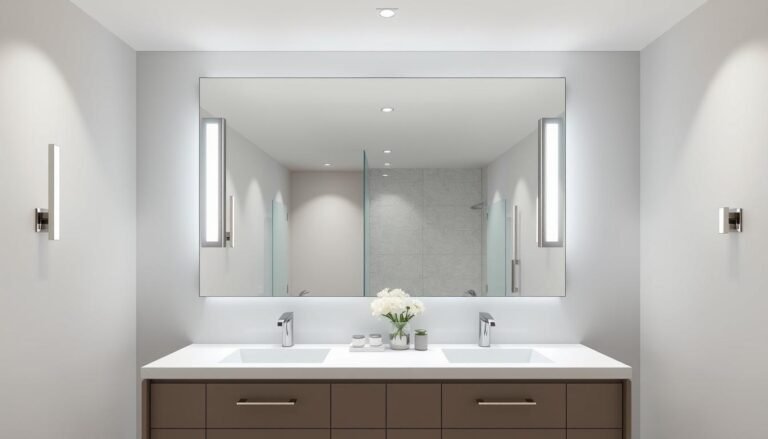
Your bathroom vanity deserves lighting that works as hard as you do. The right vanity light transforms morning routines and evening wind-downs into comfortable experiences. Whether you’re applying makeup, shaving, or simply washing your hands, proper bathroom lighting makes every task easier. Bathroom vanity lights do more than illuminate. They set the mood, complement your…
Your role as a bridesmaid comes with excitement and responsibility. One of the most important decisions you’ll make is choosing the perfect hairstyle for the big day. The right wedding hairstyles for bridesmaids complement the bride’s vision while letting your personality shine through. Finding a look that works for your hair type can feel overwhelming….